The Phantom 4 Pro obsidian model by DJI is a little power house of a drone. When it first came out in August of 2017 and began shipping in September. It quickly sold out and many drone enthusiasts like myself were forced to wait till the next run came out to the public. I ordered the end of September and it came at the end of November. Hello early Christmas present.

DJI Phantom 4 Pro Obsidian
Why the Obsidian model? For me, my choice to go with the obsidian model over the standard Phantom 4 pro model was what I believed to be was and has proven to be is its more visible in the sky above me. I flew, with my neighbors Phantom 3 prior to purchase and while easy to see up against a high gray cloud or down in the marsh from on top of the hill it was still very hard to see above 200 ft on a clear blue-sky day. The only downside to this is when I am flying in a valley area in the winter with no greenery on the trees the P4P Obsidian can be harder to locate if you glace away to spot a nearby plane or bird. This is also why we added strobe LED’s to it.
In addition to the DJI Phantom 4 Pro (P4P) I looked at the Inspire 2 by DJI while it has more features on it and interchangeable cameras and its base price is around $3,000 and I would have wanted to upgrade the camera which meant more money given to DJI. With the P4P the price tag was cheaper with the base model coming at $1,500 and for I realistically need to do with my it for my company it was more than capable enough to handle the day to day operations.
Getting what you pay for is something I really like, when I bought the P4P I also invested in two extra batteries. The battery for the P4P last about 30 minutes in optimal conditions and takes about 45 to 50 minutes to completely charge. This way I can keep flying with minimal down time. I compared it to the battery for the Yuneec Typhoon H and DJI seems to have a more durable battery and overall life span when comparing the two.
The camera on the DJI P4P comes with a 20-mega pixel 1-inch CMOS sensor which is really nice. I do wish the lens was a little bit bigger/longer, it has FOV 84ᵒ 8.8mm/24 mm (35 mm format equivalent), I’m used to shooting with 50mm lenses on my DSLR so this is something that I have to get used to on the drone. Though it is amazing with the wide-angle shots and being able to create nice panoramic photographs.
Setting up the camera for the drone is fairly simple, I am not the biggest fan of the “Auto” setting for still photographs they tend to come out dark and require more post work. The manual setting is quite easy to work though when using the touch screen in conjunction with the dial on the right-hand side of the controller. As for the video it is super sharp in 4K it feels like you could almost reach out and touch what you’re flying past.
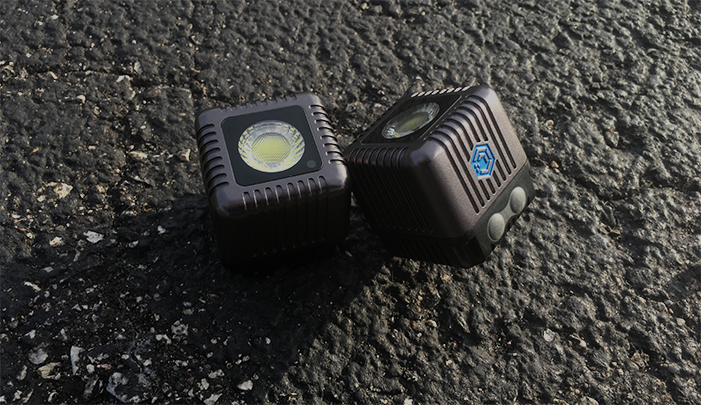
As for the controller there a few different ways to configure it. I set it up similar to a PS4 controller so my left stick is forward and back on the left stick and the right stick is set up for panning left and right as well as climbing and descending in altitude. The nice thing about the sticks is they are adjustable up and down by spinning the stick clockwise or counter clockwise. I think this is a great feature because it allows you to set the control sticks to better fit your hand. There are also two programable buttons on the under side of the DJI controller. It allows you to setup special features. I do a lot of photography before sunset with my drone and in the low light conditions the red strobe light on the front arms are able to be turned off by setting one of the function buttons to do so. This is a nifty little feature because the camera is not picking up the excess red light from the strobe lights.
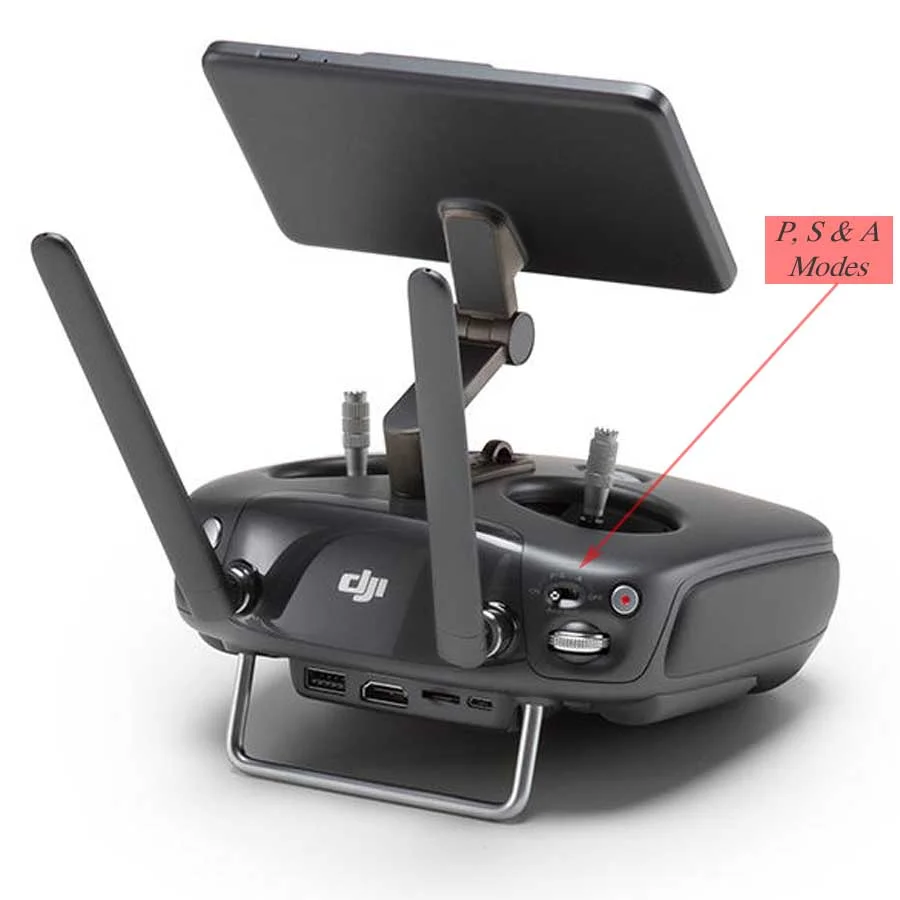
DJI Phantom 4 Pro Obsidian Remote
The P4P also has three different flight types all of them are select-able from the controller on the left side. They are marked by the letters P, S and A with a little switch below them. They stand for Positioning, Sport and Attitude. In the Positioning setting the drone stays pretty level and is great for video and shooting stills on a single plane. The drone will also react to commands a little bit slower than in the other settings I have found and will also fly a bit slower as to not get the props in view. In sport mode you can feasibly achieve speeds of 45mph. I have only flown in this mode a few times in a large farm field and I can say that 40 is defiantly doable but your collision and avoidance system is greatly reduced so your likely hood of a crash increases. In both the P and S settings when you take your fingers off the stick the drone will stop and hover where you left the drone at. In the Attitude setting the forward sensing and GPS sensors are turned off and unlike the P and S settings when you take your fingers off the control sticks the drone will drift with the wind. I am not the biggest fan of this setting because I have yet to find a use for it when I fly. It does still fly at a faster speed like in the sport mode. You will notice in the P and S modes the rear lights on the drone are green and the front will be red, and when you are in A mode the rear lights will be yellow/amber and the front will still remain red.

Marsh Pano Photo on a DJI Phantom 4 Pro
On one the recent updates DJI gave the P4P a few of the features the Mavic series has which is the panoramic modes. For a still photographer like myself this is something that is really handy. Now I can just tap on the screen and bring up the pano style I would like to use and tap the screen again and the DJI flight app does the rest. I cannot say enough how much I like this it has really taken out of guess work and fiddling with pictures in post to make sure they all fit together correctly. Now don’t get me wrong I still have to put them into the post editing software but at least all the photos are grouped together and are in one batch.
Overall, I think this drone is everything a entry level drone pilot to a semi pro/pro drone pilot could really ask for. The drone is extremely responsive and handles wells and is also quite durable. The price point can seem like it is a bit on the expensive side but you are getting what you pay for and more. After looking and doing research on the P4P for about six months and they buying one and now flying the P4P for the past four months I couldn’t be happier with my choice in drone type and manufacture.